Frequently Asked Questions
Frequently asked questions about Dual products and where to buy them. Don’t see the answer to your question? Contact Us.
General Questions
Toll Free Customer Support: 1-866-382-5476
Office Hours: Monday – Friday, 9AM – 5PM EST
Contact them via email here.
Search for the model number in question below. Any applicable manuals, firmware updates, or compatible apps are available on the individual product pages.
Visit dualav.com and search for the model number in question.
For a list of Dual retailers visit the where to buy page.
Receivers
General Questions
Not every receiver will charge a phone – all have a USB port, but some ports are not powerful enough to supply charging. Some include a 2AMP charge while others have a 1AMP charge, and a higher AMP number will charge the phone more quickly. Using multiple features like navigation, phone, music streaming etc. will also slow the charge.
If the phone can accept a 2.1 Amp charge, and you are connecting to a 1.5 Amp fast-charge USB port, then the phone will still charge at a faster speed than the standard 1 Amp charge rate. However, the ‘Fast Charge’ notice only appears when the phone is connected to a USB port that supports 2.1 Amp charging.
To fix touchscreen issues use the ‘Calibration’ screen in the Settings menu to re-calibrate. Please refer to the owner’s manual for specific instructions.
If accessing the calibration screen is not an option, please reset the receiver by pressing the reset button or removing the receiver from all power for 10 minutes.
Confirm that the remote is facing the receiver and that the remote batteries have charge. If the remote is mounted to the steering wheel the rounded side needs to face the receiver.
Test the new receiver by connecting it directly to the vehicle’s battery. Take both the red wire and the yellow wire and connect them on the positive side of the battery, then take the black wire and connect it to the negative side of the battery. Please press the power button on the unit to turn on the unit. If this resolves the issue and the unit is functioning correctly, and the issue is with either the wiring or any adapters that may have been used in installation. Otherwise, if the receiver still does not turn on, the unit could be defective and need to be replaced.
Did you remove the 2 transport screws on top of the radio before installation? This will prevent any CD/DVD from ejecting from the radio.
If the CD/DVD will not eject, with the receiver powered on, use a paperclip and press and hold the pinhole-sized reset button (see the instruction manual for your models reset button location) until the receiver shuts off. Anything in the disc player will eject at this point, correcting the problem.
Audio Questions
Are there any amplifiers in your system? If yes, see below.
Confirm the remote turn-on wire is connected to the corresponding wire on the vehicle harness. This is either labeled “Remote” or “AMP Turn On” and is usually blue or blue with a white stripe.
If there are no amplifiers in your system, see below.
You can test if the problem is with the receiver by testing the receiver with a spare speaker that is NOT connected to the vehicle. Connect the speaker directly to the receivers Front Speaker wires of the head unit. If you do not receive sound, then the receiver will need to be replaced. If you do receive sound, then the issue is with the vehicle’s internal amp or possibly a defective 3rd party wiring interface.
The first time a phone is paired to a new device, the Bluetooth volume is preset to 50% on the phone. Please turn the Bluetooth volume up on the phone and this setting will be saved for every auto reconnect after.
*For Apple phones there is an additional setting to raise the Bluetooth volume.
You will go to Settings> Sound & Haptics> Headphone Safety> Reduce Loud Sounds then slide the bar up all the way.
Some units may have Bluetooth microphones built into the front of the receiver or external microphones.
Many Bluetooth microphone issues have to do with the user’s proximity to the microphone or with road noise (e.g. windows, sunroof, etc.). Try experimenting with different microphone placements and closing any open windows. Additionally, some units have microphone volume control which can adjusted manually to improve the audio.
For external Bluetooth microphone issues, please confirm the mic is fully inserted into the 3.5mm mic input.
If you have a powered antenna, then the blue wire must be connected for the AM/FM Tuner to work. If the blue wire is connected properly and the Tuner is still not working, try another station as the one you are listening to may be out of range.
If no other stations come in clearly, then test if the problem is with the receiver or the antenna. To do so, use a piece of speaker wire a few feet long and touch the metal part of the wire to the back hole of the antenna slot. If the receiver gets better reception using the wire for the antenna, the problem is with triggering the vehicle power antenna or a problem with the antenna itself.
Sirius XM Tuners do not come with all receivers and need to be purchased separately. If you have a tuner installed and change the Sirius channel to 0, the display will show you the Sirius Radio ID number. If no tuner is installed, then you will see a ‘Check Tuner’ message. If you see a ‘Check Antenna’ message, please confirm that the antenna is plugged into the Sirius Tuner and that the antenna has a clear view of the sky.
Android Auto / Apple CarPlay
Confirm that the cable you are using to connect your phone to the receiver is the original one that came with your device or is one rated for data transfer. Many cables are rated for charging only.
Android Auto does require the vehicle to be in park for the first setup. This is related to the Parking Brake Wire, which needs to be connected to the parking brake (-)
Screen Mirroring Questions
Confirm that the cable you are using to connect your phone to the receiver is the original one that came with your device or is one rated for data transfer. Many cables are rated for charging only.
Since mirroring is considered video playback, the parking brake wire will need to be properly connected to the parking brake (-) for the screen to mirror.
Depending on phone operating system restrictions not all apps are available for screen mirroring.
Speaker or Subwoofer Questions
General Questions
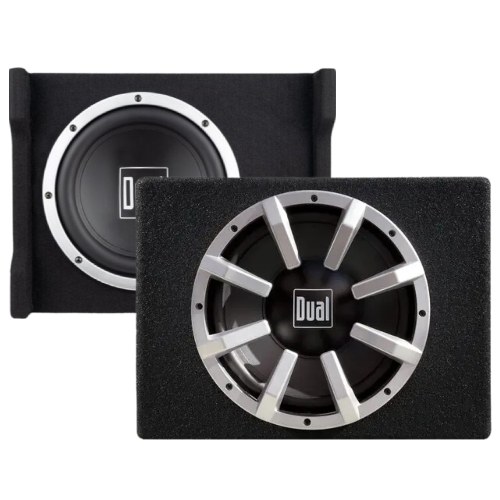
Before installing your speaker or subwoofer, test it to confirm it is working properly. Touch the leads of a 9 Volt battery to the leads of the speaker – positive lead (red) to positive battery end, and negative lead (black) to the negative battery end. You will know the speaker or sub is working if you hear a pop. Note: Do not leave the battery connected to the speaker as this will cause damage or even blow the speaker.

